This Week's Video Supplies
Pentart Fineline Crackle for Beautiful Vintage Decoupage
How to Decoupage Napkins with ZERO Wrinkles! My Water Method
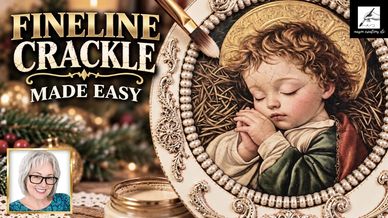
If you'd like to learn more about how to use Pentart 2 Part crackle medium, you're going to love this video. I've gathered links to all the supplies I used while creating this tutorial. I hope it makes shopping easy and inspires you to give it a try!
If you haven't seen the complete tutorial yet, click here to watch!
Want to create beautiful, delicate antique cracks over your decoupage projects? In this step-by-step tutorial, I'll show you how to use Pentart Fineline Crackle, a two-component crackle system, to achieve a gorgeous vintage finish! Today, we're transforming an ordinary wooden plate into a beautiful Christmas keepsake featuring a precious image of baby Jesus. You'll learn how to apply both components of Pentart Fineline Crackle and use Pentart Antique Paste to reveal those delicate cracks and bring the image to life. We'll also add dimensional air-dry clay embellishments and highlight those beautiful raised details with touches of gold wax for an elegant, old-world finish.
Supplies I used:
Antique-Folkart Antiquing Medium
Antique-Pentart Antiquing Paste Umber
Fineline Crackle Varnish System
Paint-Dixie Belle Chalk Paints
Silicone Molds-Baroque Style Curlicues (Amazon)
Silicone Mold-Rope Borders (Amazon)
Varnish-Polyvine Heavy Duty Varnish Satin
Varnish-Winsor & Newton Solvent Based Gloss Varnish
Tools I used:
Palette Knives Set of 10 Pieces (Amazon)
How to Decoupage Napkins with ZERO Wrinkles! My Water Method
How to Decoupage Napkins with ZERO Wrinkles! My Water Method
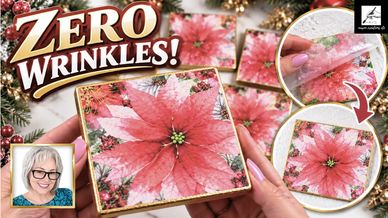
If you'd like to learn more about how to decoupage a napkin on a ceramic coaster with absolutely NO wrinkles, you're going to love this video. I've gathered links to all the supplies I used while creating this tutorial. I hope it makes shopping easy and inspires you to give it a try!
If you haven't seen the complete tutorial yet, click here to watch!
Tired of wrinkles ruining your decoupage projects? Today I'm sharing my water method for decoupaging napkins onto flat surfaces, and the results are absolutely beautiful — not a single wrinkle!
In this step-by-step tutorial, I'll show you how to transform ordinary 4x4 ceramic tiles into elegant Christmas coasters using decorative napkins, my water method of decoupage, and a few delicate hand-painted details.
We'll add beautiful gold accents to the poinsettias, finish the edges with gold paint, and seal everything with Polyvine Heavy Duty Varnish for a moisture- and heat-resistant finish.
**SPECIAL NOTE** If you plan to use a glazed tile, you will need to prime differently because of the shiny surface. You'll need to prime with 1 coat of Polyvine Multi Surface lacquer in the dead flat finish and let dry overnight. Then proceed with decoupaging your napkin.
Supplies I used:
Ceramic Tiles for Coasters 24 pack (Amazon)
Varnish-Polyvine Heavy Duty Varnish Satin
Polyvine Multi Surface Lacquer-dead flat finish
Tools I used:
Paint Brush- Polyvine Varnish Brush
Misc Supplies:
Ribbon
I Tried Cream Paste in Silicone Molds… The Results Are Amazing!
I Tried Cream Paste in Silicone Molds… The Results Are Amazing!
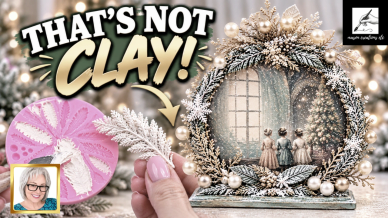
If you'd like to learn more about working with Stamperia Cream Paste, I've gathered links to all the supplies I used while creating this tutorial. I hope it makes shopping easy and inspires you to give it a try!
If you haven't seen the complete tutorial yet, click here to watch!
What if you could create beautiful, delicate Christmas embellishments that actually bend around your project? In today's step-by-step tutorial, I'll show you how I use cream paste and silicone molds to create flexible, dimensional decorations for a gorgeous vintage Christmas snow globe!
We're transforming a simple MDF snow globe shape into an elegant Christmas decoration featuring beautiful decoupage, delicate greenery, soft sage greens, shimmering gold foliage, and pearl accents.
Supplies I used:
Antique-Folkart Antiquing Medium
Glaze-Dixie Belle Pearlescent Glaze
Mdf-Chunky Snow Globe Wood Cutout
Paint-Dixie Belle Chalk Paints
Rice Paper-Victorian Christmas
Silicone Mold-Christmas Foliage (Amazon)
Silicone Mold-Christmas Snowflakes (Amazon)
Silicone Mold- Sicilian Boarders (Amazon)
Texture Paste Opaque Matte Varnish-Polyvine Heavy Duty Varnish Satin Wax Rub-Decor Wax-Eternal
Tools I used:
Paint Brush- Polyvine Varnish Brush
Palette Knives Set of 10 Pieces (Amazon)
Silicone Makeup Brushes (Amazon)
Misc Supplies:
Gold Christmas foliage
I Bought These Wooden Shapes With Absolutely NO Plan!
I Tried Cream Paste in Silicone Molds… The Results Are Amazing!

Watch to see how this simple Christmas display came to be, with absolutely no plan! I've gathered links to all the supplies I used while creating this tutorial. I hope it makes shopping easy and inspires you to give it a try!
If you haven't see the complete tutorial yet, click here to watch!
What happens when you start a Christmas craft project with absolutely NO PLAN?
This tutorial is a little different from my usual videos. I'm taking you behind the scenes for a rare glimpse into how my creative brain REALLY works.
Along the way, I'll also introduce you to the water method of decoupage, a wonderful technique that can help create a beautifully smooth, virtually wrinkle-free finish on flat surfaces.
Supplies I used:
Antique-Folkart Antiquing Medium
Bottle Brush Christmas Trees-30 pieces (Amazon)
Polyvine Glitter Maker for Paint and Varnish
Paint-Dixie Belle Chalk Paints
Rice Paper-Gilded Candy Canes and Poinsettia
Varnish-Polyvine Heavy Duty Varnish Satin
Tools I used :
Palette Knives Set of 10 Pieces (Amazon)
Misc Supplies:
Rhinestones, Christmas Greenery, Faux Fur, Ribbon, Small Wooden Tray
How to decoupage a seashell with virtually no wrinkles!
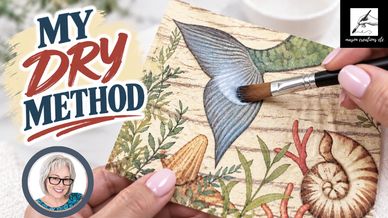
If you'd like to learn more about how to decoupage a napkin on a shell with virtually no wrinkles, I've got you covered. I've gathered links to all the supplies I used while creating this tutorial. I hope it makes shopping easy and inspires you to give it a try!
If you haven't seen the complete tutorial yet, click here to watch!
Learn how to decoupage with napkins for a virtually wrinkle-free finish using my easy dry method. In this step-by-step tutorial, I’ll show you how to decoupage a seashell and get a beautifully smooth finish—even over curves and ridges. This simple technique dramatically reduces those frustrating wrinkles when working with decorative napkins. Follow along and discover just how easy it can be to create smooth, professional-looking napkin decoupage. This tutorial is part of my Creative Library of tips and techniques.
Supplies I used:
Paint-Dixie Belle Chalk Paints
Varnish-Polyvine Multi Surface Lacquer gloss finish
Tools I used:
***Keep scrolling for more projects! ***

***Keep scrolling for more projects! ***
New "Ragging" Paint Technique-All the "how to's" right here!
Pentart Glaze Paste Turns a Christmas Ornament Into Something Elegant
Pentart Glaze Paste Turns a Christmas Ornament Into Something Elegant

If you'd like to learn more about a paint technique called "ragging". I've gathered links to all the supplies I used while creating this tutorial. I hope it makes shopping easy and inspires you to give it a try!
If you haven't seen the complete tutorial yet, click here to watch!
Learn the ragging paint technique while transforming a plain ceramic plate with decoupage, air-dry clay embellishments, and paint. I’ll show you how this simple furniture-painting technique creates a soft, dappled, almost marble-like finish that beautifully blends the rice paper into the background. Along the way, we’ll add dimensional clay details, antiquing, and metallic accents to turn an ordinary plate into an elegant vintage-inspired decorative piece.
Supplies I used:
Antique-Folkart Antiquing Medium
Paint-Dixie Belle Chalk Paints
Rice Paper-Feminine Intrigue-Set of 6
Silicone Molds-Greco Crest (Amazon)
Silicone Molds You may also like!
Varnish-Polyvine Heavy Duty Varnish Satin
Varnish-Polyvine Multi Surface Lacquer matte finish
Tools I used:
Paint Brush- Polyvine Varnish Brush
Palette Knives Set of 10 Pieces (Amazon)
Misc supplies:
Ceramic plate
Pentart Glaze Paste Turns a Christmas Ornament Into Something Elegant
Pentart Glaze Paste Turns a Christmas Ornament Into Something Elegant
Pentart Glaze Paste Turns a Christmas Ornament Into Something Elegant

If you'd like to learn more about working with Pentart Glaze Paste, I've gathered links to all the supplies I used while creating this tutorial. I hope it makes shopping easy and inspires you to give it a try!
If you haven't seen the complete tutorial yet, click here to watch!
Discover how to use Pentart Glaze Paste to create beautiful dimensional effects, from delicate flexible embellishments to raised stencil designs. In this Christmas ornament tutorial, I’ll show you two very different ways to use this unique crafting medium and bring them together to create an elegant vintage-style ornament filled with gorgeous texture and metallic detail. If you love learning new mixed-media techniques and discovering creative ways to use your supplies, I think you’re going to love this one!
Supplies I used:
Ball Chain Bronze 2.4 mm 65 feet (Amazon)
Flat Round 4 inch Fillable Ornament Blanks 12 (Amazon)
Paint-Dixie Belle Chalk Paints
Pixie Spray Repositionable Adhesive for Stencils
Rice Paper-Leafy Holiday Berries
Silicone Mold-Lace Texture Sheets (Amazon)
Varnish-Polyvine Heavy Duty Varnish
Varnish-Polyvine Multi Surface Lacquer matte finish
Tools I used:
Palette Knives Set of 10 Pieces (Amazon)
Misc Supplies
Ribbon and Rhinestone
How to Use Air-Dry Clay | Molds, Cutting, Painting & Finishing
Pentart Glaze Paste Turns a Christmas Ornament Into Something Elegant
How to Use Air-Dry Clay | Molds, Cutting, Painting & Finishing
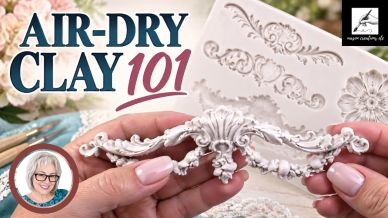
If you'd like to learn more about working with air dry clay, I've gathered links to all the supplies I used while creating this tutorial. I hope it makes shopping easy and inspires you to give it a try!
If you haven't seen the complete tutorial yet, click here to watch!
Learn how to work with air-dry clay using silicone molds, cookie cutters, paint, antiquing techniques, decorative finishes, and more! In this step-by-step tutorial, I’ll show you how I mold and attach clay embellishments, create rounded or squared edges when cutting clay, and use paint, decoupage, glitter, antiquing, and metallic wax to completely change the finished look. I’ll also share an important storage tip that can help keep your unused air-dry clay fresh and ready for your next project.
Supplies I used:
Antique-Folkart Antiquing Medium
Palette Knives Set of 10 Pieces (Amazon)
Pumpkin Cookie Cutters Set with Box, Set of 5 (Amazon)
Silicone Molds-Baroque and Curlicues (Amazon)
Silicone Makeup Brushes (Amazon)
Varnish-Polyvine Heavy Duty Varnish
Misc. supplies: Glass Mason Jar 8 ounce
Seashell Christmas Ornament with No Mess Glitter!
Mason Jar Tissue Dispenser with Decoupage, Stenciling, and Air Dry Clay!
How to Use Air-Dry Clay | Molds, Cutting, Painting & Finishing

If you'd like to make one of these beautiful Christmas ornaments for yourself and learn about "NO MESS" glitter, I've gathered links to all the supplies I used while creating this project. I hope it makes shopping easy and inspires you to give it a try!
If you haven't seen the complete tutorial yet, click here to watch!
Love glitter but hate the mess? This elegant DIY Christmas ornament features a simple no-mess glitter technique that gives you all the gorgeous sparkle without glitter ending up everywhere! In this step-by-step tutorial, I’ll show you my secret for creating beautiful, controlled sparkle that stays exactly where you put it. We’ll combine decoupage, paint, glitter, and gorgeous dimensional details to transform a simple ornament into an elegant Christmas decoration filled with vintage-inspired holiday charm.
Supplies:
Paint Brush- Polyvine Varnish Brush
Paint-Dixie Belle Chalk Paints
Varnish-Polyvine Heavy Duty Varnish
Misc. supplies: Greenery, Glitter and Ribbon
Pet Treat Jar with Decoupage and Air Dry Clay!
Mason Jar Tissue Dispenser with Decoupage, Stenciling, and Air Dry Clay!
Mason Jar Tissue Dispenser with Decoupage, Stenciling, and Air Dry Clay!

If you'd like to make one of these adorable pet treat jars for yourself, I've gathered links to all the supplies I used while creating this project. I hope it makes shopping easy and inspires you to give it a try!
If you haven't seen the complete tutorial yet, click here to watch!!
Turn a plain glass jar into an adorable DIY pet treat jar using decoupage, air-dry clay, and mixed media techniques! This glass jar makeover features the cutest gnome kitten and puppy surrounded by sunflowers and bees. I’ll show you how decoupage, handmade clay embellishments, paint, and shimmering gold wax transform an ordinary jar into a one-of-a-kind decorative treat container. Wait until you see those little details come together!
Supplies:
Antique-Folkart Antiquing Medium
Glaze-Dixie Belle Pearlescent Glaze
Paint Brush- Polyvine Varnish Brush
Paint-Dixie Belle Chalk Paints
Rice Paper- Pet Sunflower Gnomes
Silicone Molds-Sunflowers (Amazon)
Silicone Molds-Bumble Bee (Amazon)
Varnish-Polyvine Heavy Duty Varnish
Varnish-Polyvine Multi Surface Lacquer matte finish
Mason Jar Tissue Dispenser with Decoupage, Stenciling, and Air Dry Clay!
Mason Jar Tissue Dispenser with Decoupage, Stenciling, and Air Dry Clay!
Mason Jar Tissue Dispenser with Decoupage, Stenciling, and Air Dry Clay!
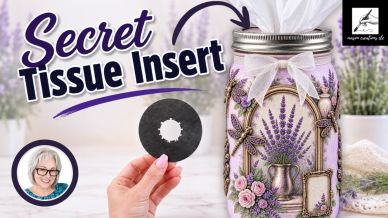
If you'd like to make one of these beautiful tissue dispensers for yourself, I've gathered links to all the supplies I used while creating this project. I hope it makes shopping easy and inspires you to give it a try!
If you haven't seen the complete tutorial yet, click here to watch!
***If you've ever wanted to make a mason jar tissue holder that actually works—and looks like something you'd buy in a boutique—you need to see this. I'll show you my favorite tissue dispenser insert that's so easy, gorgeous lavender rice paper, clay embellishments, textured stenciling, and every step to create this stunning piece from start to finish.
**The Dusty Plum Chalk Paste is on order and will be in shortly. Click the link below and then click the "notify me" button and you'll get an email once it's been re-stocked.
Supplies:
Antique-Folkart Antiquing Medium
Mason Jar 32 Ounce Wide Mouth 4 Pack (Amazon)
Paint-Dixie Belle Chalk Paints
Palette Knives Set of 10 Pieces (Amazon)
Pixie Spray Repositionable Adhesive for Stencils
Silicone Molds-Dragonflies (Amazon)
Silicone Molds-Lavender Flowers (Amazon)
Silicone Makeup Brushes (Amazon)
Tissue Refills-6 pack (Amazon)
Varnish-Polyvine Heavy Duty Varnish
Varnish-Polyvine Multi Surface Lacquer matte finish
Misc Supplies: Ribbon
DIY Coastal Mermaid Picture Frame with Decoupage, Air Dry Clay and Real Sand That Stays Put!
DIY Coastal Mermaid Picture Frame with Decoupage, Air Dry Clay and Real Sand That Stays Put!
DIY Coastal Mermaid Picture Frame with Decoupage, Air Dry Clay and Real Sand That Stays Put!

If you'd like to make one of these beautiful mermaid frames for yourself, I've gathered links to all the supplies I used while creating this project. I hope it makes shopping easy and inspires you to give it a try!
If you haven't seen the complete tutorial yet, click here to see watch!
DIY mermaid picture frame using decoupage, air dry clay, mixed media, and coastal crafting techniques turns an ordinary wood frame into a stunning ocean masterpiece. From sculpted waves and shimmering pearls to real sand and beautiful sea life, every layer adds depth, texture, and a little magic. If you love elegant decoupage projects, this one is filled with inspiration you'll want to recreate.
**The Tropical Fish Rice Paper and Seashells Rice Paper are temporarily out of stock. Click the "notify me" button to receive an email when it arrives.
Supplies:
Antique-Folkart Antiquing Medium
Bubble Beads (no hole) (Amazon)
Paint-Dixie Belle Chalk Paints
Pearls Flatback Assorted Colors (Amazon)
Rhinestones Flatback Assorted Colors (Amazon)
Silicone Molds-Baroque Style Curlicues (Amazon)
Silicone Molds-Tiny Crowns (Amazon)
Varnish-Polyvine Heavy Duty Varnish
Misc Supplies: Wooden Frame
Dollar Tree Cardboard Decoupaged Gift Box with Decoupage!
DIY Coastal Mermaid Picture Frame with Decoupage, Air Dry Clay and Real Sand That Stays Put!
DIY Coastal Mermaid Picture Frame with Decoupage, Air Dry Clay and Real Sand That Stays Put!
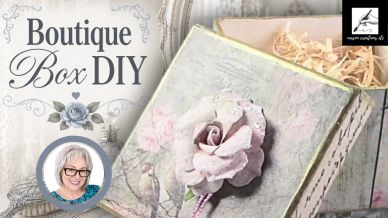
If you'd like to make one of these beautiful Dollar Tree gift boxes for yourself, I've gathered links to all the supplies I used while creating this project. I hope it makes shopping easy and inspires you to give it a try!
If you haven't seen the complete tutorial yet, click here to watch!
Transform a Dollar Tree cardboard gift box into an elegant shabby chic decoupage keepsake box using rice paper, gold accents, and vintage pink roses. Watch an ordinary box become something that looks like it belongs in a boutique gift shop. With delicate birds, shimmering details, and an easy step-by-step tutorial, you'll discover how simple techniques can create a beautiful handmade treasure that's almost too pretty to give away.
Supplies:
Glaze-Dixie Belle Pearlescent Glaze
Paint-Dixie Belle Chalk Mineral Paints
Rice Paper-Butterflies and Birds
Tassels 5.11 inch 100 pcs-25 colors (Amazon)
Varnish-Polyvine Heavy Duty Varnish
Misc Supplies: Cardboard box
Snowman Christmas Ornament with Decoupage and Air Dry Clay!
DIY Coastal Mermaid Picture Frame with Decoupage, Air Dry Clay and Real Sand That Stays Put!
Snowman Christmas Ornament with Decoupage and Air Dry Clay!

If you'd like to make one of these beautiful Christmas ornaments for yourself, I've gathered links to all the supplies I used while creating this project. I hope it makes shopping easy and inspires you to give it a try!
If you haven't seen the complete tutorial yet, click here to watch!
How to blend paint around rice paper decoupage while transforming a Dollar Tree ornament into elegant Christmas décor! This step-by-step mixed media tutorial features air dry clay, dimensional snow, and beautiful color blending techniques. Sometimes the prettiest Christmas decorations begin with the simplest materials. Watch as an inexpensive plastic ornament becomes a timeless handmade keepsake full of texture, depth, and holiday charm.
Supplies:
**The rice paper that I used is out of stock at the moment, and will be returning closer to the Christmas season. I've added a link to other snowman rice papers that you may like!
The actual snowman paper I used is no longer in stock. I've added a link for some other papers you may like!
Antique-Folkart Antiquing Medium
Ball Chain Bronze 2.4 mm 65 feet (Amazon)
Glitter Paint Maker for Paint and Varnish
Heart Ornament Blank Clear (Amazon)
Paint-Dixie Belle Chalk Paints
Silicone Molds-Angel Wings (Amazon)
Silicone Mold-Christmas Poinsettias (Amazon)
Silicone Mold-Rope Borders (Amazon)
Varnish-Polyvine Heavy Duty Varnish
Varnish-Polyvine Multi Surface Lacquer matte finish
Misc Supplies: Blank ornament, ribbon, greenery, pearl embellishments
Chickadee Vase Decoupage a Dark Napkin on a Dark Background!
Snowman Christmas Ornament with Decoupage and Air Dry Clay!
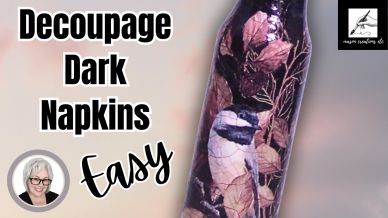
If you'd like to make one of these beautiful vases for yourself, I've gathered links to all the supplies I used while creating this project. I hope it makes shopping easy and inspires you to give it a try!
If you haven't seen the complete tutorial yet, click here to watch!
***Learn how to decoupage a Dollar Tree glass vase with a black background napkin, blend paint seamlessly, and create a beautiful crackle finish with copper mica powder. If dark backgrounds have ever intimidated you, this simple trick changes everything. Watch an ordinary vase transform into an elegant chickadee masterpiece with rich color, glowing metallic cracks, and techniques you'll use again and again in your decoupage and mixed media projects.
Supplies:
Fineline Crackle Varnish System
Napkin-Chickadee on Black Background
Paint-Dixie Belle Chalk Paints
Polyvine Multi Surface Lacquer matte finish
Misc Supplies: Glass vase
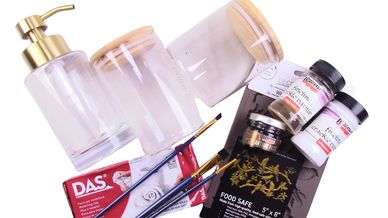
On my craft table in progress! Glass Jar Bougie Bathroom Set
On my craft table in progress! Fancy Cow Terracotta Planter with decoupage and air dry clay
On my craft table in progress! Fancy Cow Terracotta Planter with decoupage and air dry clay
On my craft table in progress! Fancy Cow Terracotta Planter with decoupage and air dry clay
On my craft table in progress! Introducing Moonshine Metallics
On my craft table in progress! Introducing Moonshine Metallics
On my craft table in progress! Introducing Moonshine Metallics
On my craft table in progress! Christmas Tissue Dispenser
On my craft table in progress! Introducing Moonshine Metallics
On my craft table in progress! Introducing Moonshine Metallics
What’s on my craft table next?
On my craft table in progress! Introducing Moonshine Metallics
What's on my craft table next?
What's on my craft table next?
What's on my craft table next?
What's on my craft table next?
What's on my craft table next?
What's on my craft table next?
What's on my craft table next?
What’s on my craft table next?
What's on my craft table next?
What's on my craft table next?